
Table of Contents
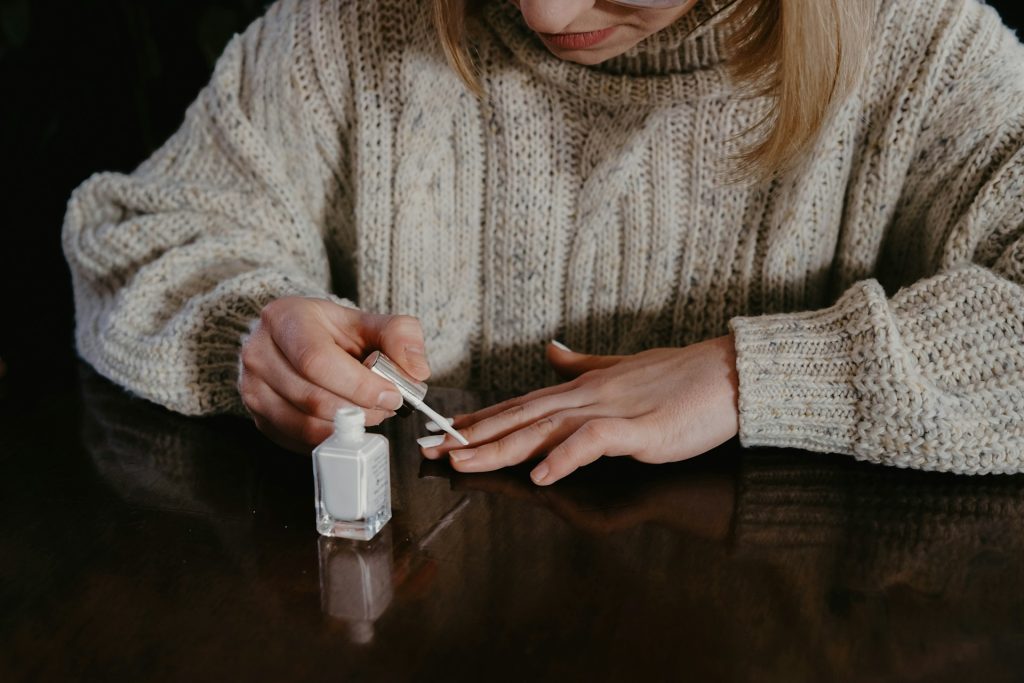
You don’t always need a team of manicurists or a Hollywood budget to pull off gorgeous celebrity nail looks.
I’ve found five gorgeous celebrity nail looks that you can easily do at home. I’ve also broken them into simple steps that anyone can follow.
Trust me, with the right tools and a little patience, these 5 celebrity-inspired nail looks you can DIY and are totally within reach.
1. Hailey Bieber’s Glazed Donut Nails

The glazed donut nail trend took over social media, and it’s still going strong. You can get this shiny, pearly look with normal polish and a few tips.
You’ll need:
- Neutral polish,
- Chrome powder (or a metallic white polish), and
- A glossy top coat.
How to Achieve This:
Step 1: Start with a pale pink or beige base color. Any neutral shade close to your natural nail color works perfectly.
Step 2: Once that’s completely dry, take your chrome powder and gently buff it onto the surface, or if you’re using metallic polish, apply a very thin layer.
The key is building up thin layers rather than globbing it all on at once.
Step 3: Finish with a super glossy top coat to get that glazed shine.
The whole look takes about 20 minutes and lasts over a week with proper top coat application.
2. Kerry Washington’s Modern Minimalist Art
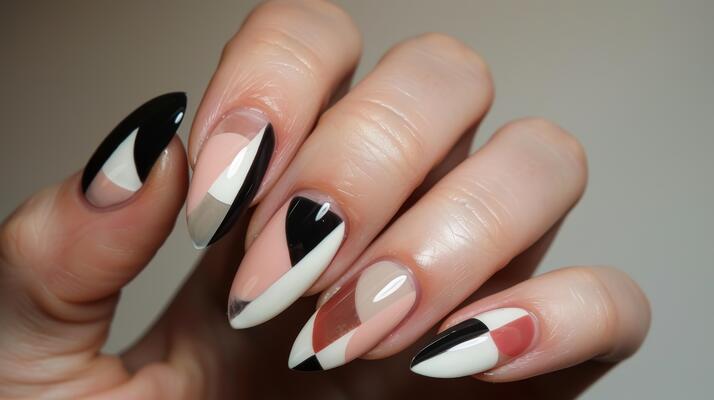
Kerry’s nail game always hits the perfect balance between subtle and striking.
Her geometric nail art proves that simple patterns can make a huge impact.
The best part? This look only needs two polish colors and some tape.
How to Achieve This:
Step 1: Start with a true nude base that matches your skin tone.
For deeper skin tones, look for warm-toned nudes with red or orange undertones. For lighter skin, peachy or beige undertones work well.
Step 2: Once your base is completely dry, use thin striping tape to create geometric shapes. Triangles at the base of the nail or clean diagonal lines work beautifully.
Step 3: Paint over the exposed areas with a contrasting color (Kerry often chooses gold or deep navy).
Step 4: Peel off the tape while the polish is still slightly wet for the sharpest lines.
Step 5: Finish with a high-shine top coat to seal your design and add a glossy dimension.
3. Zendaya’s Minimalist French Tips
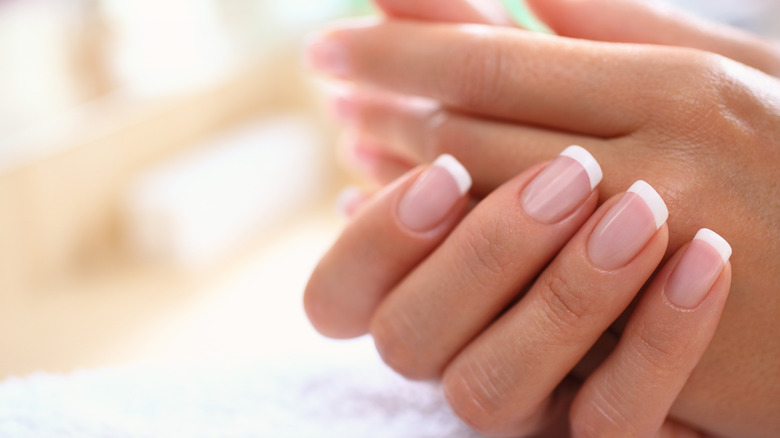
Zendaya’s modern take on French tips is perfect for work or special events.
Instead of thick white tips, she goes for super thin lines at the edge. It’s a small change that makes your nails look way longer.
How to Achieve This:
Step 1: Paint your nails with a sheer pink base coat first.
Step 2: When it’s dry, use white polish and a thin nail art brush to draw the finest line possible along the tips.
If you’re worried about steady hands, try using French tip guide stickers. The trick is keeping that white line as thin as possible.
Step 3: A quick-dry top coat seals everything in place and adds shine.
4. Selena Gomez’s Edgy French Twist
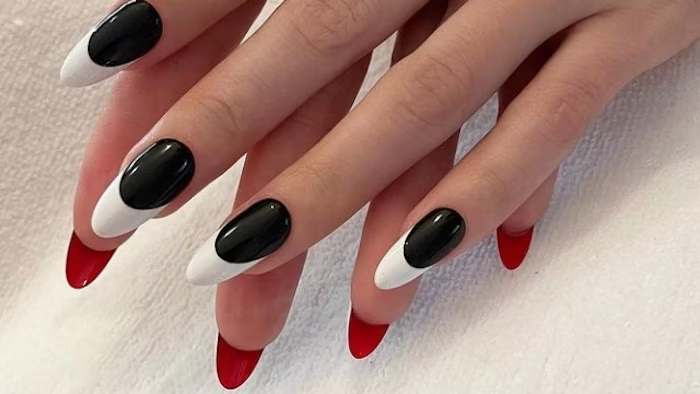
Selena loves playing with classic looks to give them a modern edge. Her black and white French twist is a perfect example – it’s bold, eye-catching.
How to Achieve This:
Step 1: Paint your nails with a base coat first.
Step 2: When it’s dry, paint your whole nail black. Let that dry completely.
Step 3: Next, use French tip guides (or regular scotch tape if you don’t have guides) to create that curved smile line near the tip.
Step 4: Paint the tips white, but make them a bit thicker than regular French tips.
The contrast between the black base and white tips is what makes this look pop.
Step 5: Pull off the guides while the white polish is still a bit wet to get clean lines.
Step 6: Finish with a glossy top coat to make everything smooth and shiny.
If you mess up the white line, use a small brush dipped in nail polish remover to clean it.
5. Margot Robbie’s Barbie Glitter
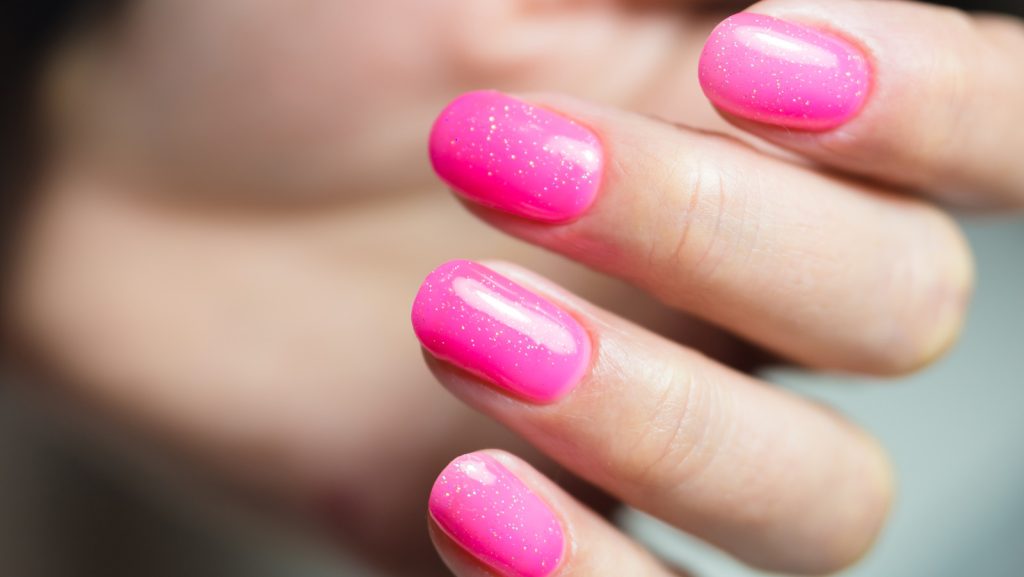
Margot loves her sparkly nails and you can wear this to a party or work; it works for both.
The glitter fades from tip to base, so it sparkles just enough to catch eyes.
How to Achieve This:
Step 1: Apply a nude polish base that matches your skin tone.
Step 2: While it’s still slightly tacky, use a makeup sponge to dab fine glitter polish onto the tips, gradually fading it toward the middle of the nail.
The sponge helps create that perfect fade effect.
Step 3: Build up the glitter in thin layers until you get the intensity you want.
Step 4: A thick top coat smooths everything out and makes the glitter really shine.
Pro Tips for Long-Lasting Results
These tips will help your DIY manicure last as long as a salon job.
1. Perfect Prep
Wipe nails with vinegar or acetone before starting. Natural oils prevent the polish from sticking properly.
2. Application Sequence
Paint the first base coat extra thin. Think of it like a primer for your walls; it needs to grip.
For polish, three thin coats look better than two thick ones. Then let each layer dry for 2 minutes.
Then apply top coat when the last color layer is still slightly tacky. This helps all layers bond together.
3. Edge Protection and Mistakes
Paint the tips of your nails first. This extra step prevents chipping and extends wear time.
Also, wait until the polish is completely dry before fixing errors. Wet polish smears and makes a bigger mess.
4. Bubble Prevention
Never shake your polish bottles. Roll them between your palms instead.
Also, keep your polish in a cool, dark place. Heat and sunlight make the polish thick and clumpy.
5. Steady Hands
Rest your painting hand on the table. Keep your other hand still by anchoring your pinky finger.
6. Clean-up Strategy
Use a small angled brush dipped in acetone for precise edges. It’s easier than trying to paint perfectly.
Time to Show Off those 5 Celebrity-Inspired Nail Looks You Can DIY
See? These celebrity-style nails aren’t as hard as they look. You don’t need intense training or regular salon trips to pull them off.
Just grab your tools, follow these steps, and practice a bit. Soon you’ll be posting nail pics that look just as good.
Take it slow, build up your polish one thin layer at a time, and always use that top coat. Your friends won’t believe you did these nails yourself.

Hi, I’m Kate, a DIY enthusiast with a passion for creative nail designs. When I’m not caring for my herb garden or spending time with my two dogs, I’m trying out fresh nail colors and designs. I love mixing up my look with bold nails and accessories, and I’m excited to share my tips and ideas with others who enjoy a bit of DIY flair in their routine.