
Table of Contents
Want nails that look straight out of a professional salon without the hefty price tag? Lavender nails sit right in that sweet spot between bold and subtle.
Trust me, these nails are easier to create than you’d think. From simple solid colors to intricate designs, these lavender nail ideas will give you a perfect manicure. These 7 Lavender nail ideas that’ll make everyone ask about your manicurist.
Getting Started with the Basics
Before jumping into the designs, here’s what you’ll need:
- Base coat
- Lavender nail polish (matte and glossy options work great)
- Top coat
- Thin brush for details
- Nail stickers or gems (optional)
- Dotting tool or toothpick
- Nail polish remover and cotton swabs for cleanup
Simple but Stunning Lavender Designs
Some of the prettiest lavender nail looks are the easiest to create, and these three will prove it.
1. Classic Solid Lavender

A solid lavender manicure never goes out of style, and it’s perfect for both work and weekend plans. Here’s how to nail this look:
- Start with clean, dry nails and apply your base coat
- Wait 2 minutes for the base coat to dry completely
- Apply your first thin coat of lavender polish
- Let it dry for 2 minutes
- Add a second thin coat for full coverage
- Wait another 2 minutes
- Finish with a top coat for shine and protection
The key to making this look salon-worthy is patience between coats. Take your time, and you’ll get that perfect, streak-free finish.
2. Lavender French Tips
French tips are back in style, and this lavender twist makes them feel fresh and modern. Here’s how to get it right:
- Apply a base coat and let it dry
- Paint your entire nail with a sheer pink or nude polish
- Wait until completely dry (about 5 minutes)
- Place nail guide strips across each nail tip
- Paint the tips with lavender polish
- Remove the strips while the polish is still wet
- Wait 3 minutes
- Seal with a top coat
Your friends won’t believe you did these at home. Yes, they look that good.
3. Lavender and White Cloud Design
This dreamy design looks complex but it’s actually super simple. Here’s what to do:
- Paint all nails with lavender polish and let dry
- Cut a small makeup sponge into chunks
- Dip the sponge in white polish
- Gently dab it on your nail in cloud-like shapes
- Wait 2 minutes between layers if you want fluffier clouds
- Clean any mess around your nails with a small brush dipped in polish remover
- Seal with a top coat
The best part? No two clouds look exactly alike, so small imperfections only add to the charm.
More Advanced Options
Ready to step up your nail game? These designs take a bit more practice but the results are worth every minute.
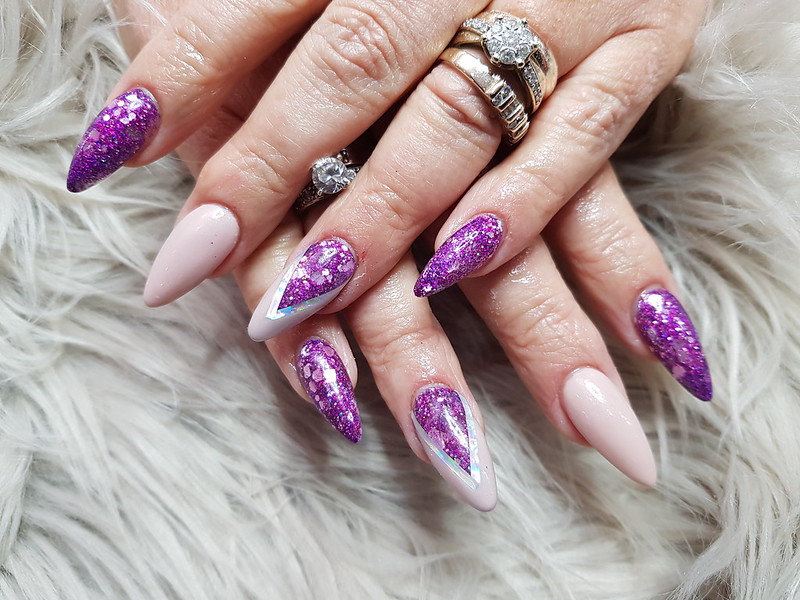
4. Glitter Gradient

This sparkly design catches the light beautifully and works for any occasion. Here’s how to get it right:
- Apply your lavender base color
- Wait until it’s almost dry but still slightly tacky
- Cut a makeup sponge to nail size
- Load the sponge with glitter polish
- Start patting from the tip of your nail
- Gradually use less pressure as you move down
- Let it dry for 3 minutes
- Apply two layers of top coat for extra shine
The key to a perfect gradient is building up the glitter slowly – you can always add more, but it’s tricky to remove.
5. Negative Space Design
This modern look is all about precision and clean lines. Follow these steps for the best results:
- Apply your base coat
- Place thin strips of tape in your desired pattern
- Press down firmly on the edges
- Paint over the entire nail with lavender polish
- Remove the tape immediately while the polish is wet
- Wait 5 minutes
- Clean any rough edges with a small brush
- Finish with a top coat
The sharp lines make this look super professional, and it’s different enough to stand out.
Quick and Easy Accent Ideas
When you want to add just a touch of something special to your lavender base, these simple accent ideas will do the trick.
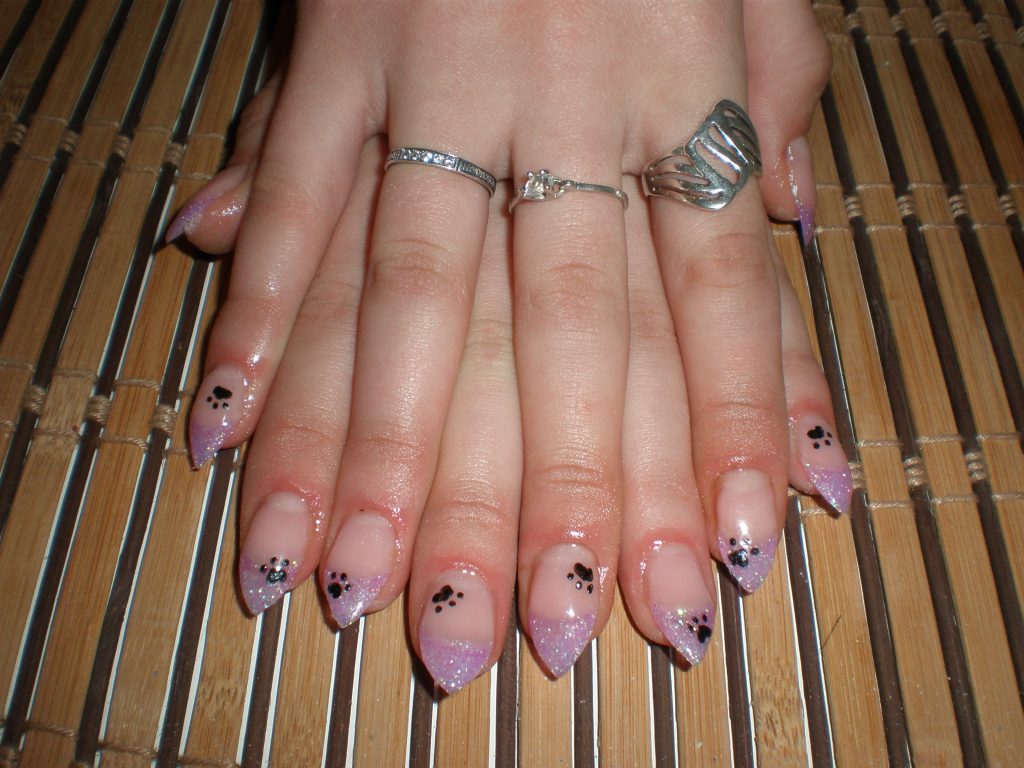
6. Lavender and Gold Dots
This simple but eye-catching design works for any occasion. Here’s how to create it:
- Paint all nails with lavender polish
- Let dry completely (about 5 minutes)
- Pour a small amount of gold polish onto the foil
- Dip your dotting tool or toothpick in the gold polish
- Create dots in your desired pattern
- Wait 3 minutes between dot layers
- Clean any mistakes with a thin brush
- Seal with top coat
Small dots look more delicate, while larger ones make more of a statement. So, choose based on your preferred style.
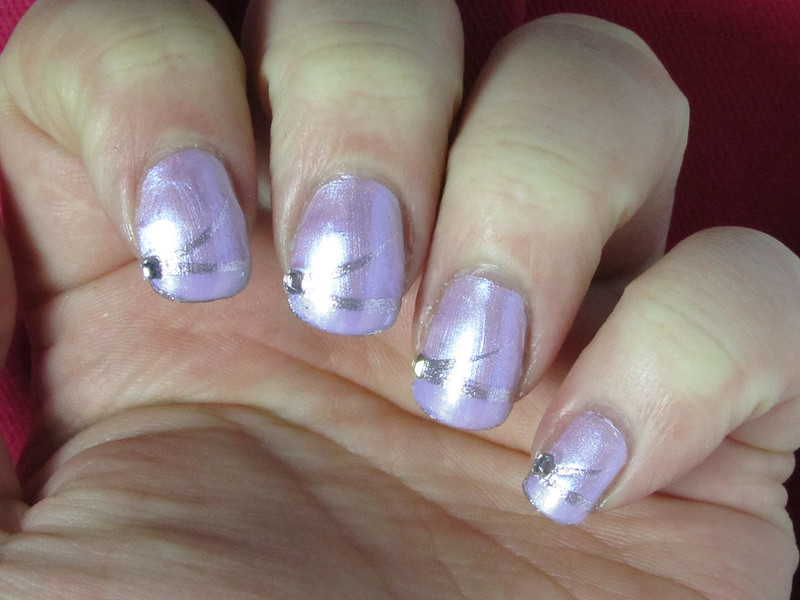
7. Simple Stripes
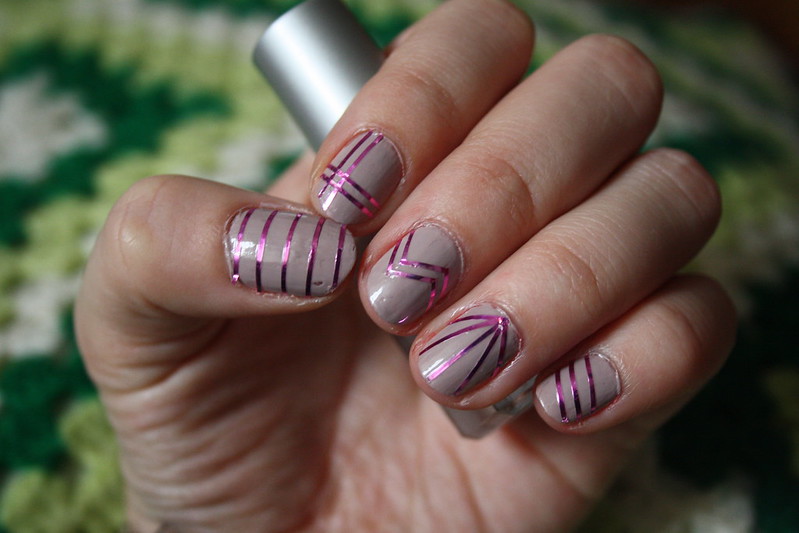
These delicate lines add just the right amount of detail to your lavender base. Here’s the process:
- Apply your lavender base color
- Let it dry completely
- Place striping tape if using, or prepare your thin brush
- Paint thin lines in your chosen accent color
- Remove tape immediately if using
- Wait 3 minutes
- Fix any uneven lines with a cleanup brush
- Add top coat
Straight lines take practice, so don’t get discouraged if they’re not perfect the first time.
Pro Tips for Long-Lasting Results

Getting your nails to look great is one thing, but here’s how to make it last:
Tip 1: Remove all traces of oil and lotion from your nails with acetone before starting
Tip 2: Never skip your base coat – it prevents staining and helps polish stick better
Tip 3: Roll your polish bottles instead of shaking them to prevent air bubbles
Tip 4: Always apply three thin coats instead of one thick one
Tip 5: Cap the free edge of your nails with polish to prevent chipping from the top
Tip 6: Wait at least 2 minutes between each coat of polish
Tip 7: Use a quick-dry top coat to prevent smudging and extend wear time
Tip 8: Wear gloves when doing dishes or cleaning to protect your manicure
Tip 9: Apply cuticle oil daily to keep the polish flexible and prevent chipping
Tip 10: Reapply top coat every 2-3 days to refresh the shine and extend wear time
What I love the most about lavender nails is its versatility.
They work for both office meetings and weekend brunches and match practically everything in your wardrobe. Plus, it’s one of those rare shades that looks good on everyone.
Your Next Manicure Awaits
These lavender nail ideas are just the beginning. Once you’ve mastered these techniques, you can mix and match them to create your unique designs. Even the simplest lavender manicure can look stunning when done with care.

Hi, I’m Kate, a DIY enthusiast with a passion for creative nail designs. When I’m not caring for my herb garden or spending time with my two dogs, I’m trying out fresh nail colors and designs. I love mixing up my look with bold nails and accessories, and I’m excited to share my tips and ideas with others who enjoy a bit of DIY flair in their routine.